
I don’t know about you but I spend a BIG chunk of my workday in my browser (I use Chrome).
It’s where I draft landing pages in Google Docs, send emails in ConvertKit, publish blog posts in WordPress and check sales numbers in SamCart.
Everything I create becomes ultimately a link, a URL that needs safekeeping somewhere.
That means having the right links readily accessible is crucial for moving smoothly through my day.
The problem: My bookmark bar looked like a junk drawer! It was an indistinguishable jumble of links, without hope of finding the one I truly needed in the moment.
Sounds familiar?
The solution seemed stupidly simple once Rodney Daut, one of our BASB Facilitators, pointed it out.
Organize your bookmarks just like you organize any other information: according to the PARA Method.
What’s PARA? A Brief Introduction
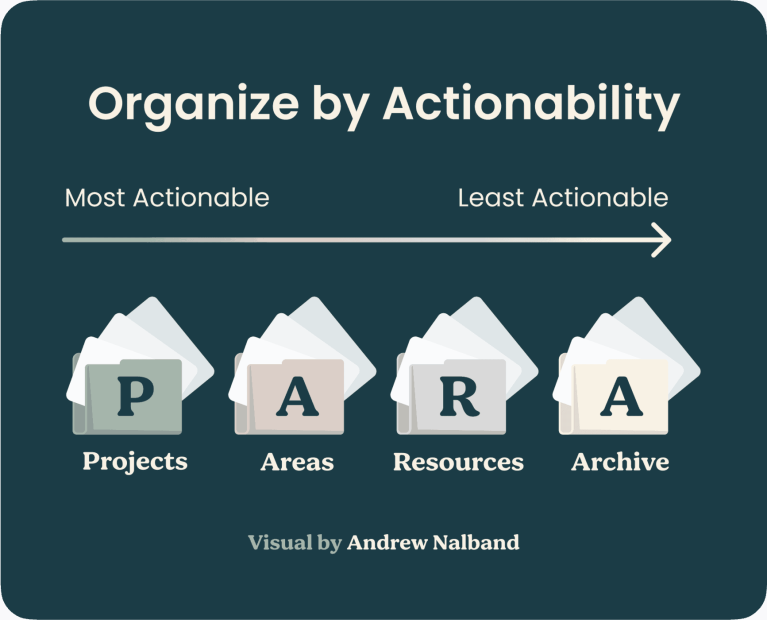
PARA stands for Projects, Areas, Resources, and Archives. It’s a simple system for organizing virtually any information in your life.
- Projects are what you’re currently working on that has a concrete outcome and timeframe. For example, some of my current projects are The PARA Method book launch, a trip to ConvertKits Craft + Commerce conference, and the Ultraspeaking cohort I’m part of.
- Areas are your responsibilities that don’t have an end date. For example, my areas include my apartment, my Muay Thai practice, and my Course Creator Lab website.
- Resources are your interests and curiosities. For example, I continuously gather resources around copywriting, minimalism, and remote living.
- Archives are all items from the previous three categories that are no longer relevant. For example, my Archive is full of trips I’ve taken in the past.
The key principle is organizing by actionability. PARA helps you keep the information you need the most right now front and center (while keeping everything else accessible but out of sight).
Want to learn more about PARA? Check out this intro.
Implementing PARA in Your Browser
I’ve had my notetaking app Evernote and my Google Drive organized according to PARA since 2020.
But it never occurred to me that I can apply the same structure to my browser. (Duh!)
Here’s what my bookmarks bar looks like after I re-organized it:
On the left side are all sites that I’m visiting multiple times per day. On the right side are my PARA folders plus the bookmark search. Finally, I have the links I need readily accessible.
Let’s look at how to implement this for yourself in a few simple steps:
Step #1: Create your Archive folder and move all your bookmarks in there
If you don’t currently have a bookmarks bar in Chrome, go to “View,” then click “Always Show Bookmarks Bar.”
Create a folder by right-clicking on the bookmarks bar and selecting “Add Folder…” Then drag and drop all your current bookmarks into your new Archive folder.
Now, you can start from a clean slate.
Step #2: Create your Projects folder and add links to your active projects
Your Projects folder should contain the links that you need the most at this moment because they’re associated with concrete outcomes you want to achieve.
Here’s an example of my Projects folder with a sub-folder for each active project.
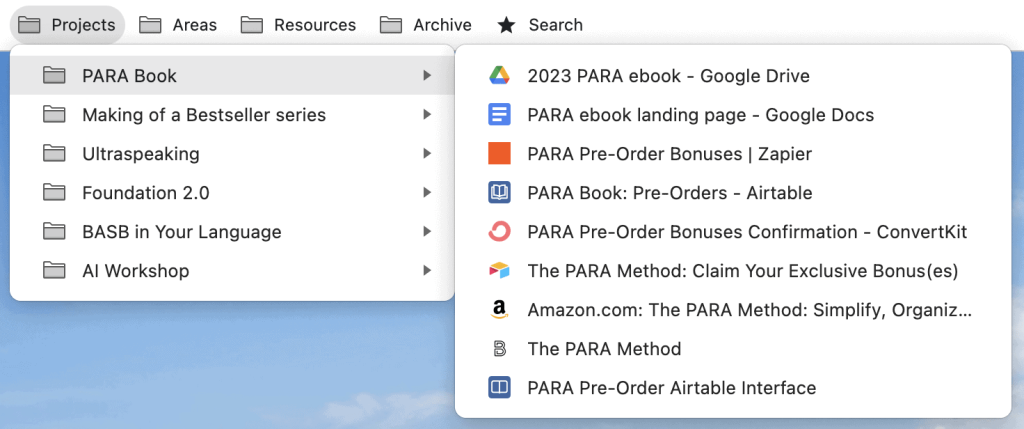
Each of these folders contains at least one link. There are no empty folders as these would just clutter the view.
Once a project is complete, I’ll move the associated folder simply to Archive.
Step #3: Create your Areas folder
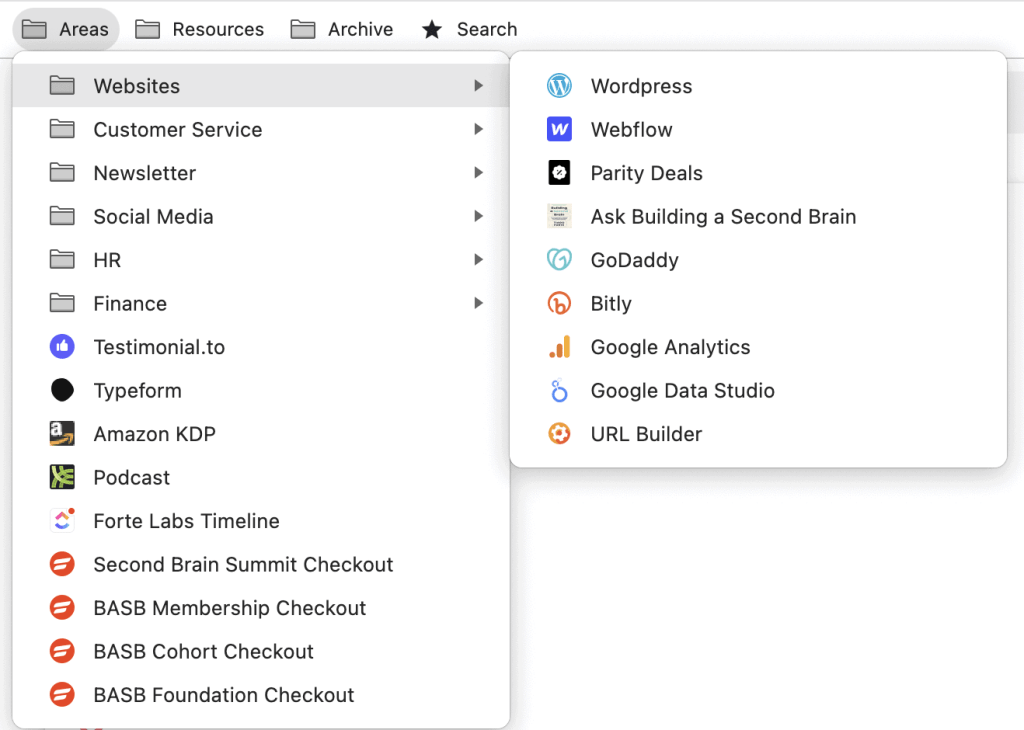
Your Areas are everything that needs continuous attention from you, without a specific end date.
For me, that includes maintaining our websites, feeding our social media channels, and creating our weekly newsletter, among others.
Here’s what my Areas folder and sub-folders look like:
Step #5: Create your Resource folder
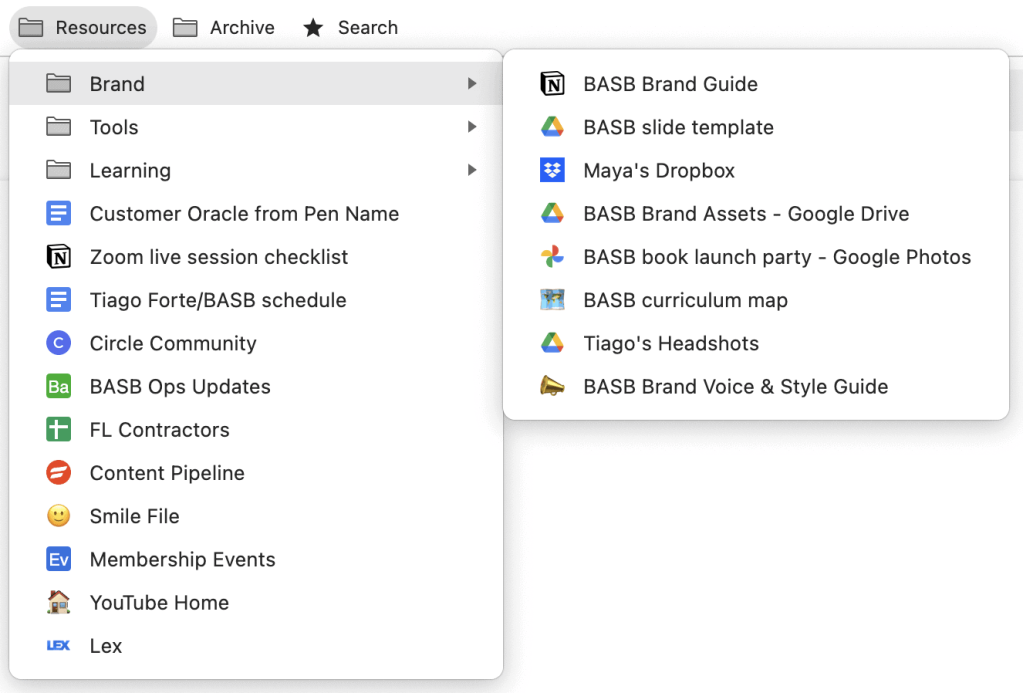
Your Resource folders contains everything else that’s useful and handy to keep around. This is a great place to save links to templates, tools, and learning resources.
This is what my Resource folder and sub-folders look like:
Optional: Add shortcuts to your most visited websites
I already know that I’ll visit a few websites multiple times per day, so I want to get to them with one click.

Here’s how you can add these icons to your bookmarks bar.
- Visit the website you want to bookmark.
- Right click on the bookmarks bar and select “Add Page…”
- Delete the “Name” and hit save.
Now, only the favicon shows up in your bookmarks bar.
Optional: Add a bookmark search
If you reach a point where you have A LOT of bookmarks stored, having a shortcut to search comes in handy.
Right click your bookmarks bar and select “Bookmark Manager.” Now, add a bookmark to the Bookmark Manager as described above.
You may want to rename it “Search”, too. It’s easy to forget that it’s your method of searching your bookmarks without that label.
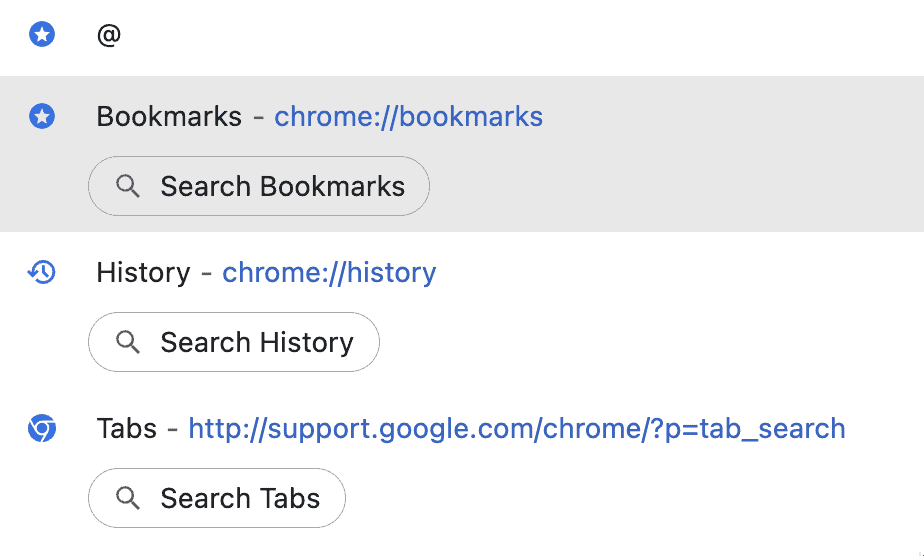
Alternatively, you can simply type “@” into your browser search bar to start searching your bookmarks, browsing history, or tabs.
Not using the Chrome browser? The same principles can be applied to any browser you might use.
After testing PARA in my browser for a month, I can say it has helped me create a more productive, friction-less work environment. And I hope it can do the same for you, too.
This blog post was written by Julia Saxena, Director of Marketing at Forte Labs, and inspired by BASB Facilitator Rodney Daut.
Follow us for the latest updates and insights around productivity and Building a Second Brain on X, Facebook, Instagram, LinkedIn, and YouTube. And if you’re ready to start building your Second Brain, get the book and learn the proven method to organize your digital life and unlock your creative potential.
- Posted in Building a Second Brain, Organizing, Productivity, Workflow
- On
- BY juliasaxenafortelabs